Render your own lard. 4 easy ways, including the instant pot method!
Did you know?
Pork fat used to be more valuable than the meat!
They never wasted anything, and pork fat had so many uses, not all of which were in our food.
Soap making
Candles
Wound healing/medicinal
Salves and balms
Greasing machines - (I use lard to season my cast iron skillets and wok)
There are 2 types of pork fat, and they aren’t always interchangeable.
Leaf lard - this is the internal fat that is around the kidneys - this is preferred for baking as it has no porky smell. It makes amazing pastry crusts.
Back fat - although we call it back fat, on our pigs, it is fat that the butcher trims off all the pork cuts. - This is best for sausage making, but can be used to render into lard for cooking.
You can render both, but they aren’t always interchangeable. Leaf lard does not work for sausage making. It melts too quickly and will leave your sausages dry. Make pies with it!
YES! You can make your own lard at home!
It is much easier than you think. Stovetop, Slow Cooker, Oven and Instant Pot all work great! I even know someone who uses a sous vide!
If you can melt butter, you can make your own lard!
When I discovered I could render lard in the Instant Pot, I felt like a cavewoman that just discovered fire! It is perfect in summer when you only want to do small batches and not heat up the house.
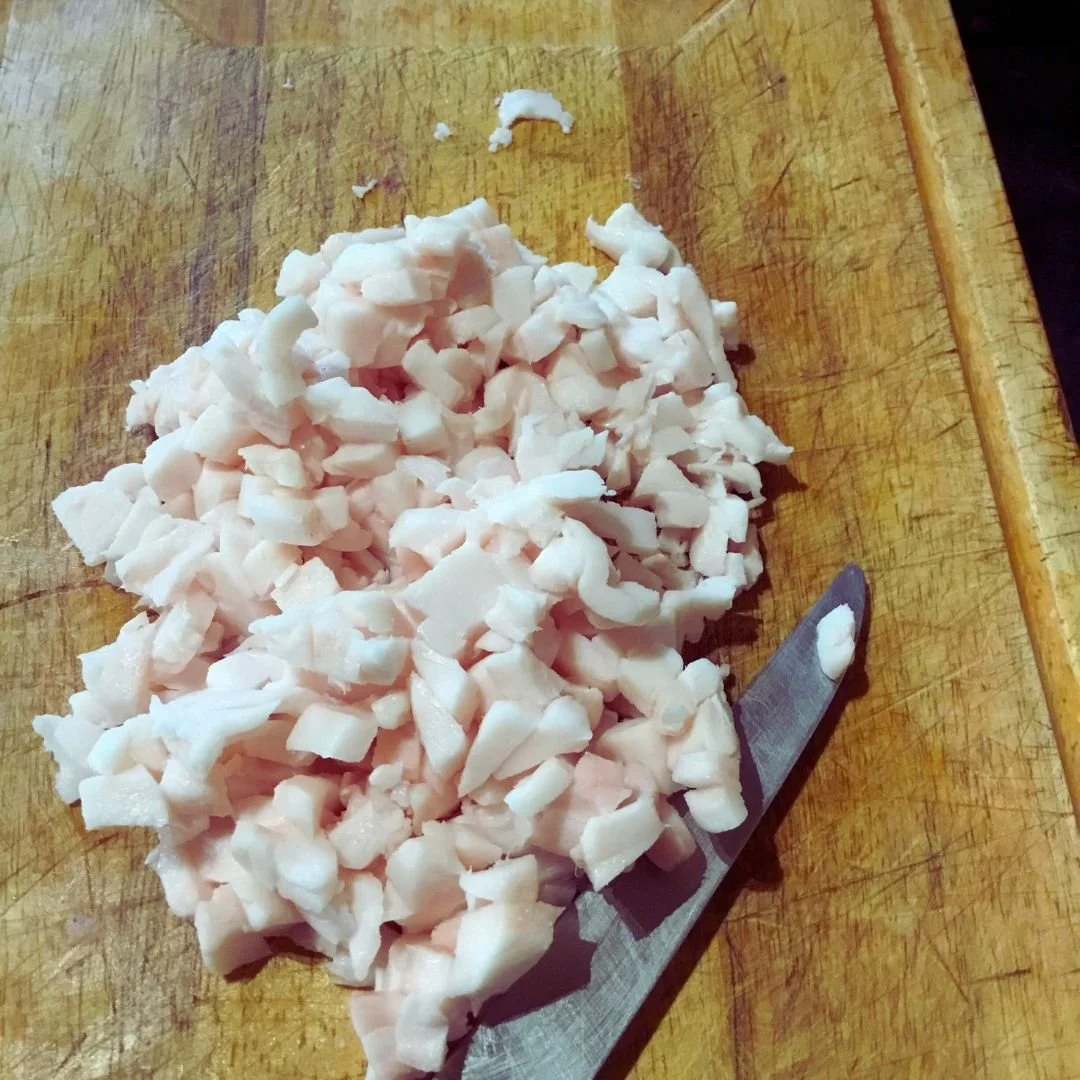
Prepare the pork fat
The fat will render more quickly if it is chopped or ground up into small pieces. I’m not going to lie - chopping fat is tedious! I have used a few different ways.
Use ground pork fat to make rendering quicker. I ask our butcher at processing time to grind it and put it in 3lb bags.
Don’t have ground fat? You can just chop up pork fat with a knife or use a food processor - this is easier if it is still slightly frozen.
Don’t want to chop the fat? I have rendered frozen fat! I put a large block of frozen fat pieces in the Instant Pot - and set it for 1 hour. It defrosts and starts to render. After 1 hour, it is soft enough to break up the fat with a spoon or even a potato masher. Then set it for another hour.
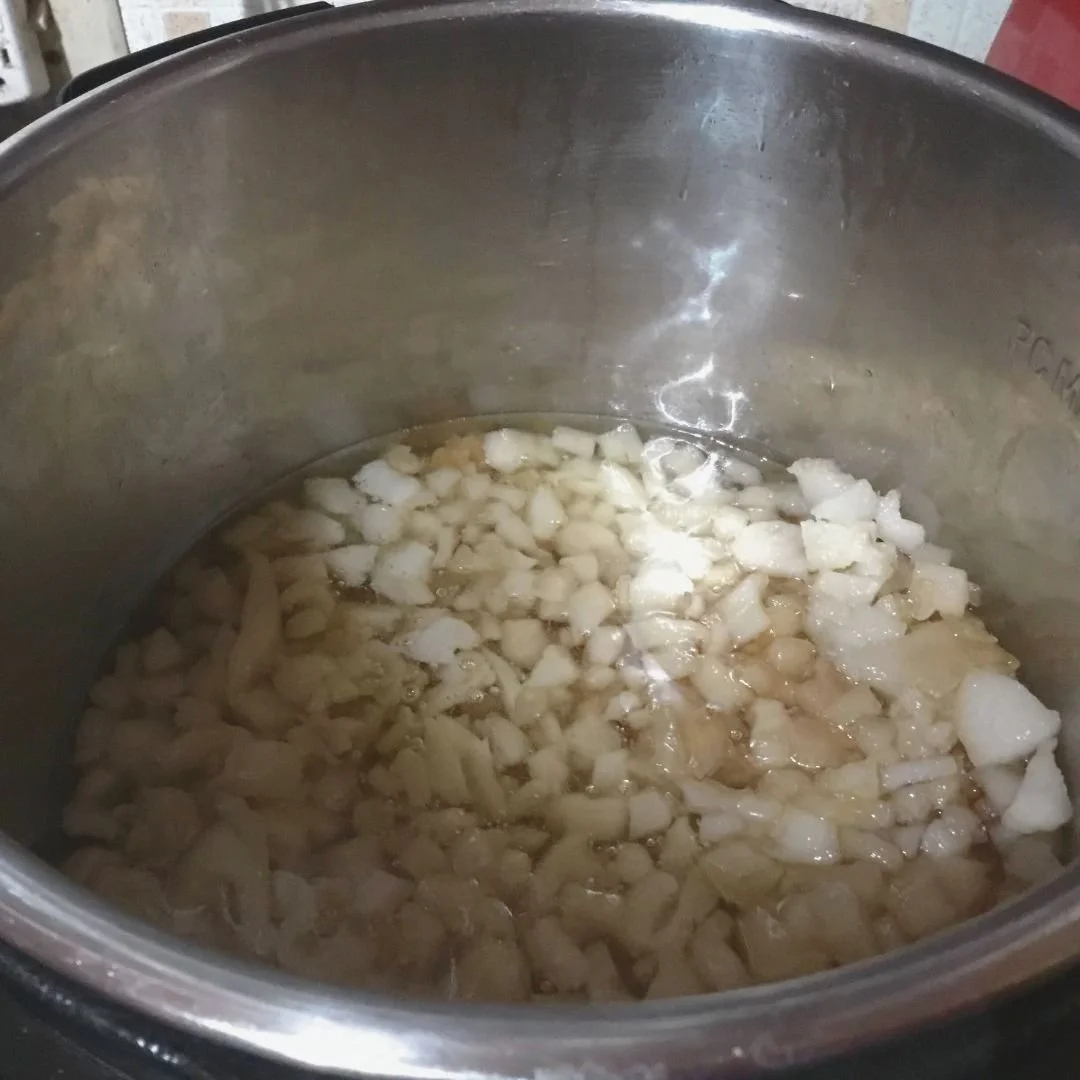
INSTANT POT
Prepare the Pot: Put your ground or chopped fat into the Instant Pot - Important: Don’t go above the “max fill” line!
Add water: Add 1/4 cup cold water. This keeps the fat from burning before it starts to melt.
The Settings: Put the lid on, set the valve to sealing, and set Pressure Cook (High) for 1 hour.
Cool down: Allow to cool using the natural pressure release.
Strain: Strain the liquid into containers (See tips about straining)
For maximum yield, you can repeat the process.
I do 2 more renderings. The fat will start to get darker, so I always strain each batch into separate containers, and I use the last rendering for frying.
Tip
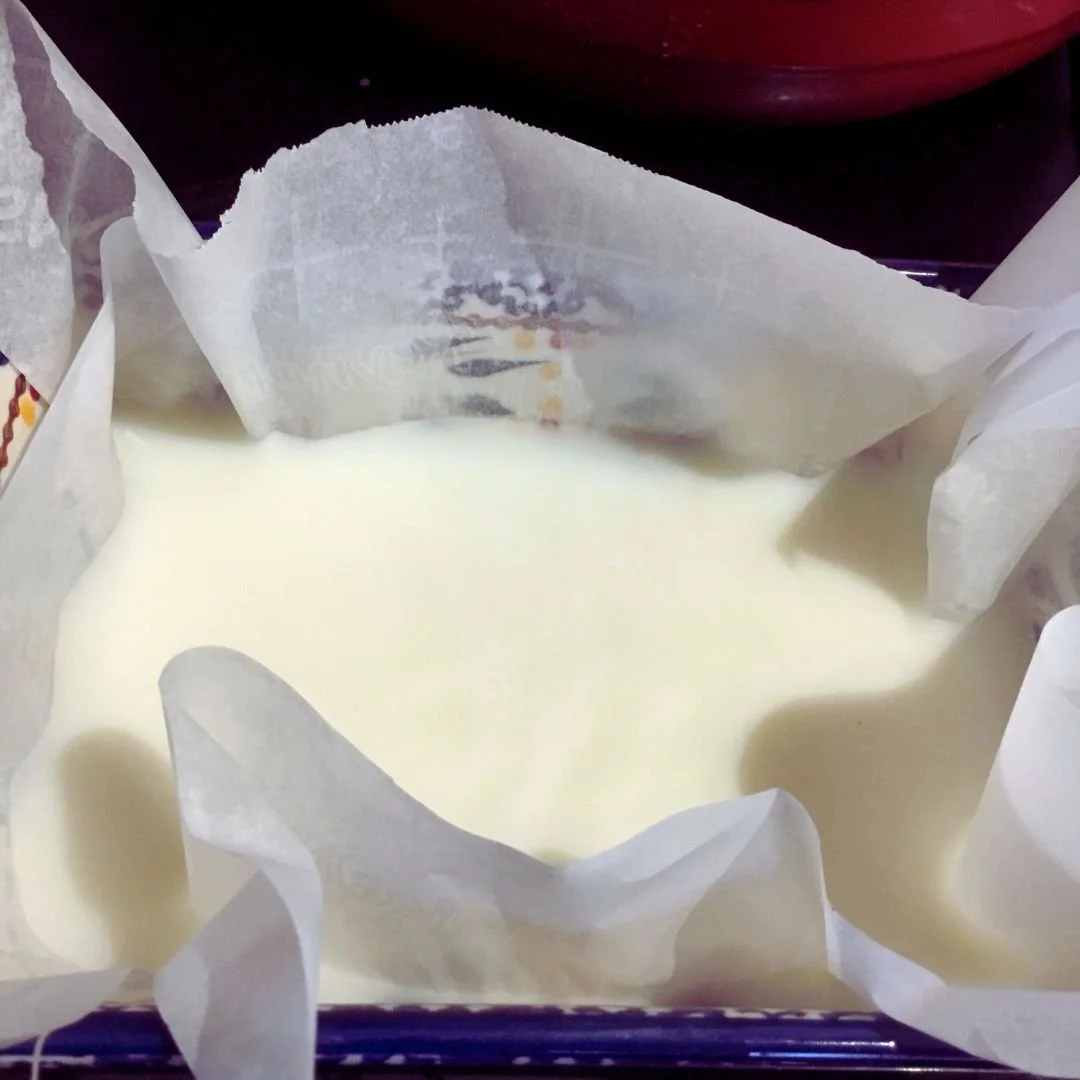
Lard rendered in the Instant Pot may still have some water left in it. This will settle as a gel under the cold rendered lard - I like to strain mine into pans lined with parchment or cling film - or muffin cases that are easy to get the lard out!
When it’s set, turn it over and scrape off the gel, then store the lard as normal.
SLOW COOKER
Fill the Slow Cooker: Place the chopped or ground fat in a slow cooker and set it to LOW.
Wait: It will take several hours but it is gentle on the fat.
Watch the cracklings (chopped up lard pieces) The cracklings will soon sink down and then rise up again. When they rise again, the lard is done.
Strain: Carefully strain into containers (See tips about straining)
STOVETOP
Choose your Pot: Place the prepared fay in a heavy pot (cast-iron Dutch ovens are perfect because they distribute heat evenly), and set your burner to a medium-low heat.
Turn it down: Once it starts to melt, turn down the heat to low.
Strain: You can strain as you go by ladling off the melted fat, or you can leave it until all the fat melts together - just keep it really low so that it doesn’t scorch. (See tips about straining)
OVEN
Set the temp: Preheat your oven to 200°F.. The low heat is gentle on the fat.
Choose your Pot: Place your prepared fat in a Dutch oven or a deep roasting tray. Don't put a lid on; you need the moisture to evaporate.
Wait: It will take several hours, depending on how much fat you are rendering.
Strain: Once the fat has melted and the cracklings are looking done, it’s time to move it to your containers. (See my tips below for straining)
If you over-cook it the lard will begin to brown and you’ll end up with lard that has a stronger porky flavour. It’s still completely usable for things like frying and sauteing, it’s just not ideal for making sweet pastries and pie crusts.
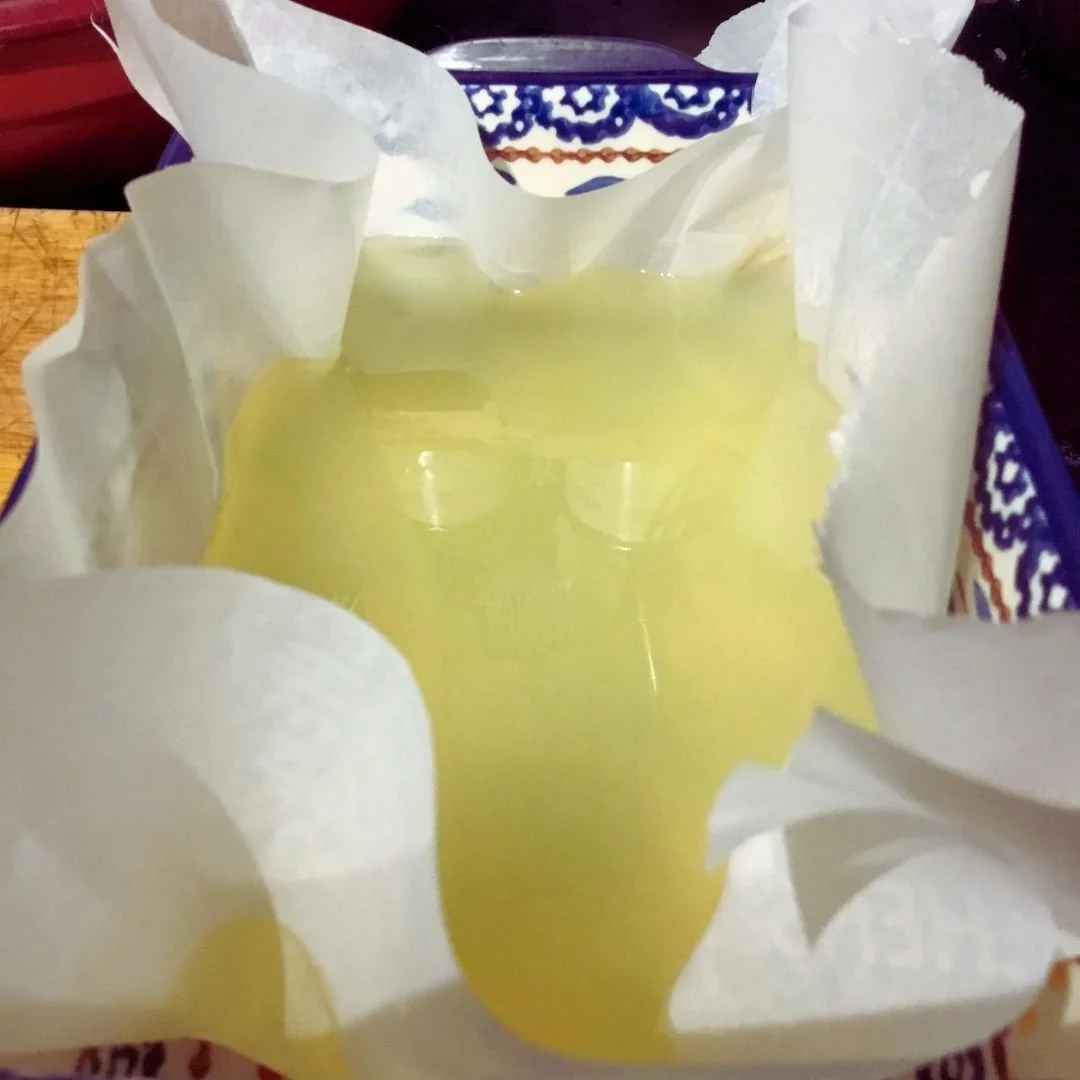
In its liquid state, the colour of the lard will be like lemonade. Once it cools and hardens, it will become pure, delicious, white goodness.
Tips for Straining & Storage
Straining
Strain it through a fine mesh sieve to remove the cracklings. Then strain it again through 3 layers of cheesecloth to remove the remaining small bits and sediment.
You must remove any bits of fat and gristle along with any tiny bits of sediment; otherwise, your lard will get mouldy.
Pure fat doesn’t grow mould; it goes rancid. So if there’s mould on it, it’s because it wasn’t rendered long enough to remove all the water and/or it wasn’t strained properly. So be sure to properly strain it.
Let it sit undisturbed at room temperature until it has cooled down and is firm (it firms up pretty quickly).
Storage
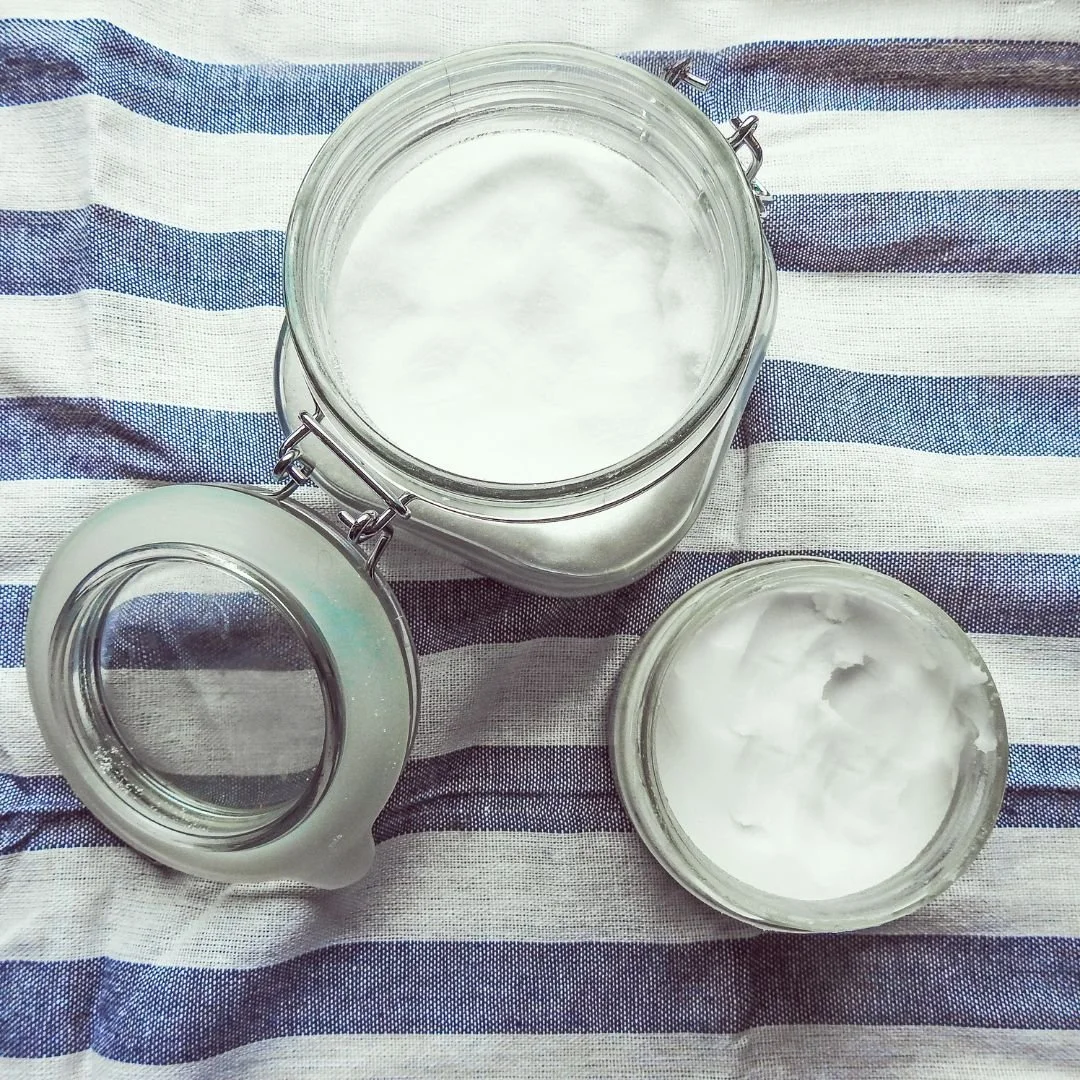
Jars
Bread pans - I line with plastic wrap - then I have brick-shaped lard
OR for pre-measured portions and easy clean up - Measure how much a muffin tin holds, line with muffin casings and pour lard in. This is my personal favourite - Then I freeze the lard and take it out as I need it.
Cracklings
What to do with the bits left behind - crispy cracklings!
Transfer them to a frying pan and fry until they’re puffy and crispy. Add your favourite seasoning. Then, if you don’t eat them straight out of the pan, you can add to salads as a crispy topping!
Clean up Tips
Yes, making lard can get a bit messy - If you have cast iron pans you need to season then put your lard covered utensils and sieve in the pans to catch all the lard drips.
You can also use parchment paper to lay your utensils on - then you use this lard-loaded paper to grease bread or cake tins, or to season cast iron.


Lard is sustainable & delicious!
It’s listed in the top 10 of the world’s most nutritious foods. What can you use it for?
You won’t find canola or avocado oil in my house, I am strictly a Lard girl!
The best chips ever, (fries to my non-Brit readers)
bread - forget the butter and olive oil, I have a recipe for a sourdough sandwich loaf and I only ever use lard!
Sauteed meats and veg
Stir fries - yes I use pork fat and lard all the time in stir-fries
Rendered lard is a great butter substitute for cakes and cookies - it is best used in cakes like chocolate cakes or heavier spiced cakes, like ginger cake - you can’t taste the pork fat, but you won’t get the buttery flavour that you would be looking for in a plainer, non-spiced cake.
Season your lard with herbs and spices and use to roast vegetables.
Sear meat.
Pakoras

If you found this content useful and would like to buy me a coffee that would be greatly appreciated!

Learn the right questions to ask when you order your pork and avoid the disappointment and frustration many farmers experience when dealing with processors.