Recipes

Dublin Coddle - Sausage, bacon and potatoes - what's not to love!

This time last year we celebrated St Patrick’s day with some traditional Irish Food - Dublin Coddle.. A stew made of Sausage, bacon, onions and potatoes that would use up whatever was left at the end of the week (It sounds like my sisters Sausage Casserole - only she would only put 1 sausage in it - it would be like finding the sixpence in a Christmas pudding if you got a piece of sausage.)

My recipe is likely not traditional because I put a can of Guinness in it - who has leftover Guinness? - no one I know!

DUBLIN CODDLE

  • 2lb Berkshire Pork Sausages (I use our Cumberland)

  • 4 oz  unsmoked British style back Bacon (you can use smoked bacon if you like)

  • 2-3lb potatoes 

  • 2 onions

  • 1tsp cracked black pepper

  • 1/2tsp salt

  • 1 tablespoon chopped parsley

  • 1 x 440ml can Guinness

  • 1 cup pork stock (I always use pork neckbone Broth) but you can use chicken stock

Preparation

  1. Preheat oven to 350 F. & put a large casserole pan on med heat.

  2. Dice bacon and add to the pan, fry for 2-3 mins until the fat starts to render out.

  3. Cut sausages & potatoes into bite-size pieces.

  4. Slice onions.

  5. Add sausages to bacon. Fry over med heat until browned

  6. Then add sliced onions & potatoes. Season with salt, pepper and sprinkle of parlsey.

  7. Pour in Guinness and bring to boil. Then add 1 cup pork stock and bring back to boil. 

  8. Cook in the oven for 2 hours.

  9. Serve with crusty bread.

Do you have a favourite Irish dish? Let me know in the comments below.

Berkshire Pork Bone Broth

I use our Berkshire pork neckbones all the time to make bone broth. It’s very easy to make and you can use a slow cooker, instant pot or make it on top of the stove (this is easy but more time consuming and needs a bit more attention, which is why I don’t do it this way.)

This broth is delicious and gelatinous, which makes it perfect for the jelly in a traditional pork pie if you don’t want to use trotters.

It is also perfect as a substitute for both chicken and beef stock.

You can roast the neckbones first if you prefer. I use whatever veg and herbs I have but have made it with just bones, salt, pepper and onion.

Ingredients

  • 2 lb ish Berkshire pork neckbones

  • 1 onion peeled, and quartered

  • 1 celery stalk, washed & cut in 4 pieces

  • 1 carrot washed & cut in chunks

  • 1 clove garlic, peeled and crushed

  • 1/2 tbsp black peppercorns

  • 1 bay leaf

  • 1 tbsp apple cider vinegar

  • 1/2 teaspoon sea salt

you can add more herbs too - sometimes I add sage and thyme and extra garlic - it depends what I have available.

Directions

Instant Pot

  1. Put all ingredients in the instant pot. Cover with water - keeping below the max fill line.

  2. Close lid and set vent to sealing. Cook on broth for a minimum of 3 hours. Allow broth to naturally release.

  3. Strain broth through a colander.

  4. Put in the fridge to cool. The broth will become quite gelatinous and any fat will rise to the top and set. This can be skimmed off and used for frying.

  5. You can freeze the broth for up to 6 months to store. Put the broth into freezer bags. I lay the freezer bags in a small tray so they are all the same shape and stack better. Or use yoghurt pots, ice cube trays or even ice lolly moulds.

Stove Top

  1. Place ingredients in a large stockpot. Cover with cold water and bring to a boil, skimming any foam that rises to the top.

  2. Turn heat down to medium-low and gently simmer for 12 hours. As the broth cooks you can reduce the heat down to low and add water as it evaporates. I wouldn’t leave this broth unattended for any length of time.

  3. Follow steps 3 from Instant Pot for straining and storage.

Slow Cooker

  1. Place ingredients in crockpot. Cover with cold water and cook for 12 hours.

  2. Follow steps 3 from Instant Pot for straining and storage.

You can use the broth for making yummy gravy, soup, stews, cooking rice or pasta in or even drink it! Enjoy!

Let me know if you make it and what is your favourite use for it.

If you like this post and would like to buy me a coffee that would be greatly appreciated!

Berkshire Pork Bourguignon - a delicious Berkshire Pork Shoulder Recipe

Recently a friend of mine inspired me to make Julia Childs beef bourguignon. I had always thought it would be too difficult to make - I found it easy but very time-consuming but omg it is sooo delicious. I am now so obsessed with it I am even curing my own small slab of bacon just for this recipe.

Our beef supply is low so I tried it with some of our Berkshire pork Shoulder. (Searches on the interweb told me that pork doesn’t work in this recipe - maybe commercially raised pork won’t but our Berkshire pork shoulder was amazing.

I have also made this in the Instant pot and finished it in the oven - It was delicious even straight out of the IP - though it doesn’t have the nice crust and doesn’t thicken.

To make the pork in the instant pot -

  • Saute the meat following the directions for browning then put on meat setting for 1 hour - let pressure release naturally.

  • Take out some of the extra gravy to cook the onions in and then put the meat in the oven while you prepare the onions and mushrooms.

I am sure this will also work in the slow cooker too - I melted mine so I need a volunteer to test it for me lol.

Ingredients

For the Berkshire Pork

  • 6 ounces unsmoked Berkshire bacon (British style) cut into small pieces

  • 2-3 pounds Berkshire Pork Shoulder or leg cut into 1-inch cubes

  • 1 tablespoon lard or olive oil

  • 1 carrot peeled and sliced

  • 1 small onion peeled and sliced

  • 1 teaspoon kosher salt

  • 1/4 teaspoon white pepper

  • 2 tablespoons flour

  • 2 1/2 cups red wine full-bodied

  • 2-3 cups stock or broth (I usually use homemade pork or chicken stock)

  • 1 tablespoon tomato paste

  • 2 cloves garlic crushed

  • 1/4 teaspoon dried thyme

  • 2 bay leaves

For the onions

  • 6 ounces pearl onions peeled

  • 1 tablespoon butter

  • 1 tablespoon olive oil

  • 4 sprigs parsley (or 1 tbsp dried parsley)

  • 1/4 tsp dried thyme

  • 1/2 bay leaf

  • 1/2 cup broth or stock

For the mushrooms

  • 1 pound white mushrooms quartered

  • 2 tablespoons butter

  • 1 tablespoon olive oil

Directions

  • Preheat the oven to 450°.

  • In a large dutch oven, heat the lard or olive oil over medium-high heat. Add the bacon and cook for several minutes until lightly browned. Remove the bacon with a slotted spoon (leave the bacon fat in the pan to brown the pork.)

  • Brown the Berkshire pork shoulder in the bacon fat/lard - don’t overcrowd the pan - brown in batches and put browned pork with bacon. Continue until all the pork has been browned.

  • Add the onions and carrots to the dutch oven and brown them, stirring occasionally.

  • Return the pork, bacon and any drippings to the dutch oven.

  • Add the salt and pepper and stir to combine. Sprinkle with the flour and stir until the meat and vegetables are well coated. Put the dutch oven uncovered into the hot oven and cook for 4 minutes. Stir the contents of the pot and continue to cook for an additional 4 minutes. (this will give the meat a nice crust).

  • Reduce the oven temperature to 325°.

  • Add the wine to the pot and add enough pork stock to barely cover the meat. Stir in the tomato paste, garlic, thyme and bay leaves. Cover the pot tightly with a lid and place back in the oven. Braise for 3-4 hours or until the pork is tender.

  • While the beef is cooking, prepare the onions and mushrooms.

For the onions

  • In a large frying pan, heat the butter and olive oil over medium-high heat until the foam has subsided from the pan.

  • Add the peeled onions and cook until they are lightly browned. Add the herbs, bay leaf and stock and bring to a simmer. Reduce heat to a medium-low, cover and cook for 30-40 minutes -- until most of the liquid has evaporated. Transfer the onions to a bowl and set aside.

For the mushrooms

  • In a large frying pan heat half the olive oil and butter until the foam from the butter begins to subside.

  • Add half the mushrooms to the pan and cook until browned. They will first absorb the oil, and then begin to brown... do not crowd the mushrooms in the pan.

  • Transfer cooked mushrooms to the same bowl as the onions. Continue with the remaining mushrooms, by heating the oil and butter until the foam subsides, adding the mushrooms and then browning them evenly.

  • When the meat is tender, take out the bay leaves and add the mushrooms and onions

  • Heat the contents through on the stovetop and serve with crusty bread and a good red wine.

I also served this with buttery mashed potatoes and Yorkshire puddings - it would also make a great pie filling!

Let me know if you tried it!


Quick and Easy Korean Pork Recipe

Using ground pork in recipes seems to be so underrated which is such a shame. Our ground Berkshire pork has an incredible depth of flavour and needs very little seasoning - we have one customer who just fries it up by itself - she says it doesn’t need anything added.

We use it in

  • chilli’s,

  • pasta sauces

  • pies - especially shepherds pies,

  • cabbage roll soup,

  • tacos,

  • meatballs,

  • burgers and of course our own sausages.

Korean Pork is one of our favourite recipes - it's so delicious and quick to make with ingredients that are usually in the cupboard. - using my instant pot means it doesn't heat the kitchen up and I can set it and forget it - but it is easy to make on the stovetop or even a slow cooker.

Korean Pork

  • 1/2 cup soy sauce

  • 1/3 cup raw honey - I use creamed honey because it is all I have.

  • 1/4 cup Berkshire pork stock - you can use chicken stock or I make my own

  • 5 cloves minced garlic minced or 1 tbsp garlic powder (not garlic salt)

  • 2 tablespoons sesame oil

  • 2 tablespoons white vinegar

  • 2 tablespoons freshly grated ginger or 1 tbsp ground ginger

  • 1-2 tablespoons sriracha sauce (depending on desired heat)

  • 1/2 teaspoon onion powder

  • 1/2 teaspoon white pepper

  • 2 lb ground Berkshire pork

Directions for instant pot

  1. Use saute setting and Saute pork in sesame oil until browned 

  2. Add rest of the ingredients.

  3. Close the lid, and make sure the pressure release valve is turned to "SEALING"

  4. Press the MEAT program button, and adjust the time to 5 minutes for ground beef/pork

  5. Leave the instant pot release pressure naturally (about  25 minutes)

  6. Serve with rice and garnish with spring onions if desired

You can make this on the stovetop just adjust the cooking time until the meat is tender.

If you have a favourite ground pork recipe I would love to know what it is. You can post in comments below.

4 ways to render lard incuding an Instant Pot method!

Pork fat was more valuable than the Pork Years ago!

They never wasted anything and pork fat Had so Many uses, not all were in our food.

  • soap making

  • candles

  • wound healing/medicinal

  • salves and balms

  • greasing machines - (I use lard to season my cast iron skillets and wok)

The 2 types of pork fat are:-

  1. Leaf lard - this is the internal fat that is around the kidneys - this is best for pastry crusts.

  2. Back fat - although we call it back fat, on our pigs it is fat that the butcher trims off the pork cuts. - This is best for sausage making but can be used to render into lard.

Culinary uses for Lard

  • Render the leaf lard for making the best pastry/pie crusts - Check out my best pastry ever recipe here

  • Rendered lard is a great butter substitute for cakes and cookies - it is best used in cakes like chocolate cakes or heavier spiced cakes, like ginger cake - you can’t taste the pork fat but you won’t get the buttery flavour that you would be looking for in a plainer - non spiced cake.

  • Use lard to make the best chips/fries!!!

  • Season your lard with herbs and spices and use to roast vegetables.

  • Sear meat

  • Sausage making - Unrendered Back fat is popular with hunters to add to lean game meat when they make their own sausages.

  • ****I use both back fat and leaf lard for cooking - but leaf lard does not work in sausage making - you need unrendered back fat for that.****

You won’t find canola or avocado oil in my house I am strictly a Lard girl!

Lard is listed in the top 10 of the worlds most nutritious foods so why wouldn’t you use it - and its sustainable & delicious!

I regularily use it for!

  • the best chips ever, (fries to my non Brit readers)

  • pastry,

  • bread - forget the butter and olive oil, I have a recipe for a sourdough sandwich loaf and I only ever use lard!

  • sauteed meats and veg

  • Stir fries - yes I use pork fat and lard all the time in stir fries

Making your own lard at home is easier than you think.

Stove top, Slow Cooker, Oven and Instant pot all work great!

Rendering fat into lard

It is not as hard as it sounds, in fact it is super easy.

If you are a bit of a kitchen gadget fiend like me you likely have every labour/time saving kitchen appliance going.

Though I did resist the instant pot for a long time, I just didn't think I needed one.

Then someone told me they had made a million (slight exaggeration) freezer meals in a day and that it would change my life.

When I burned some potatoes in one of my best pans, which was so badly burned on I couldn’t rescue it, I finally caved in and got an Instant Pot.

I needed a pot that I didn’t have to babysit, and it turns out the perfect way to make small batches of lard!

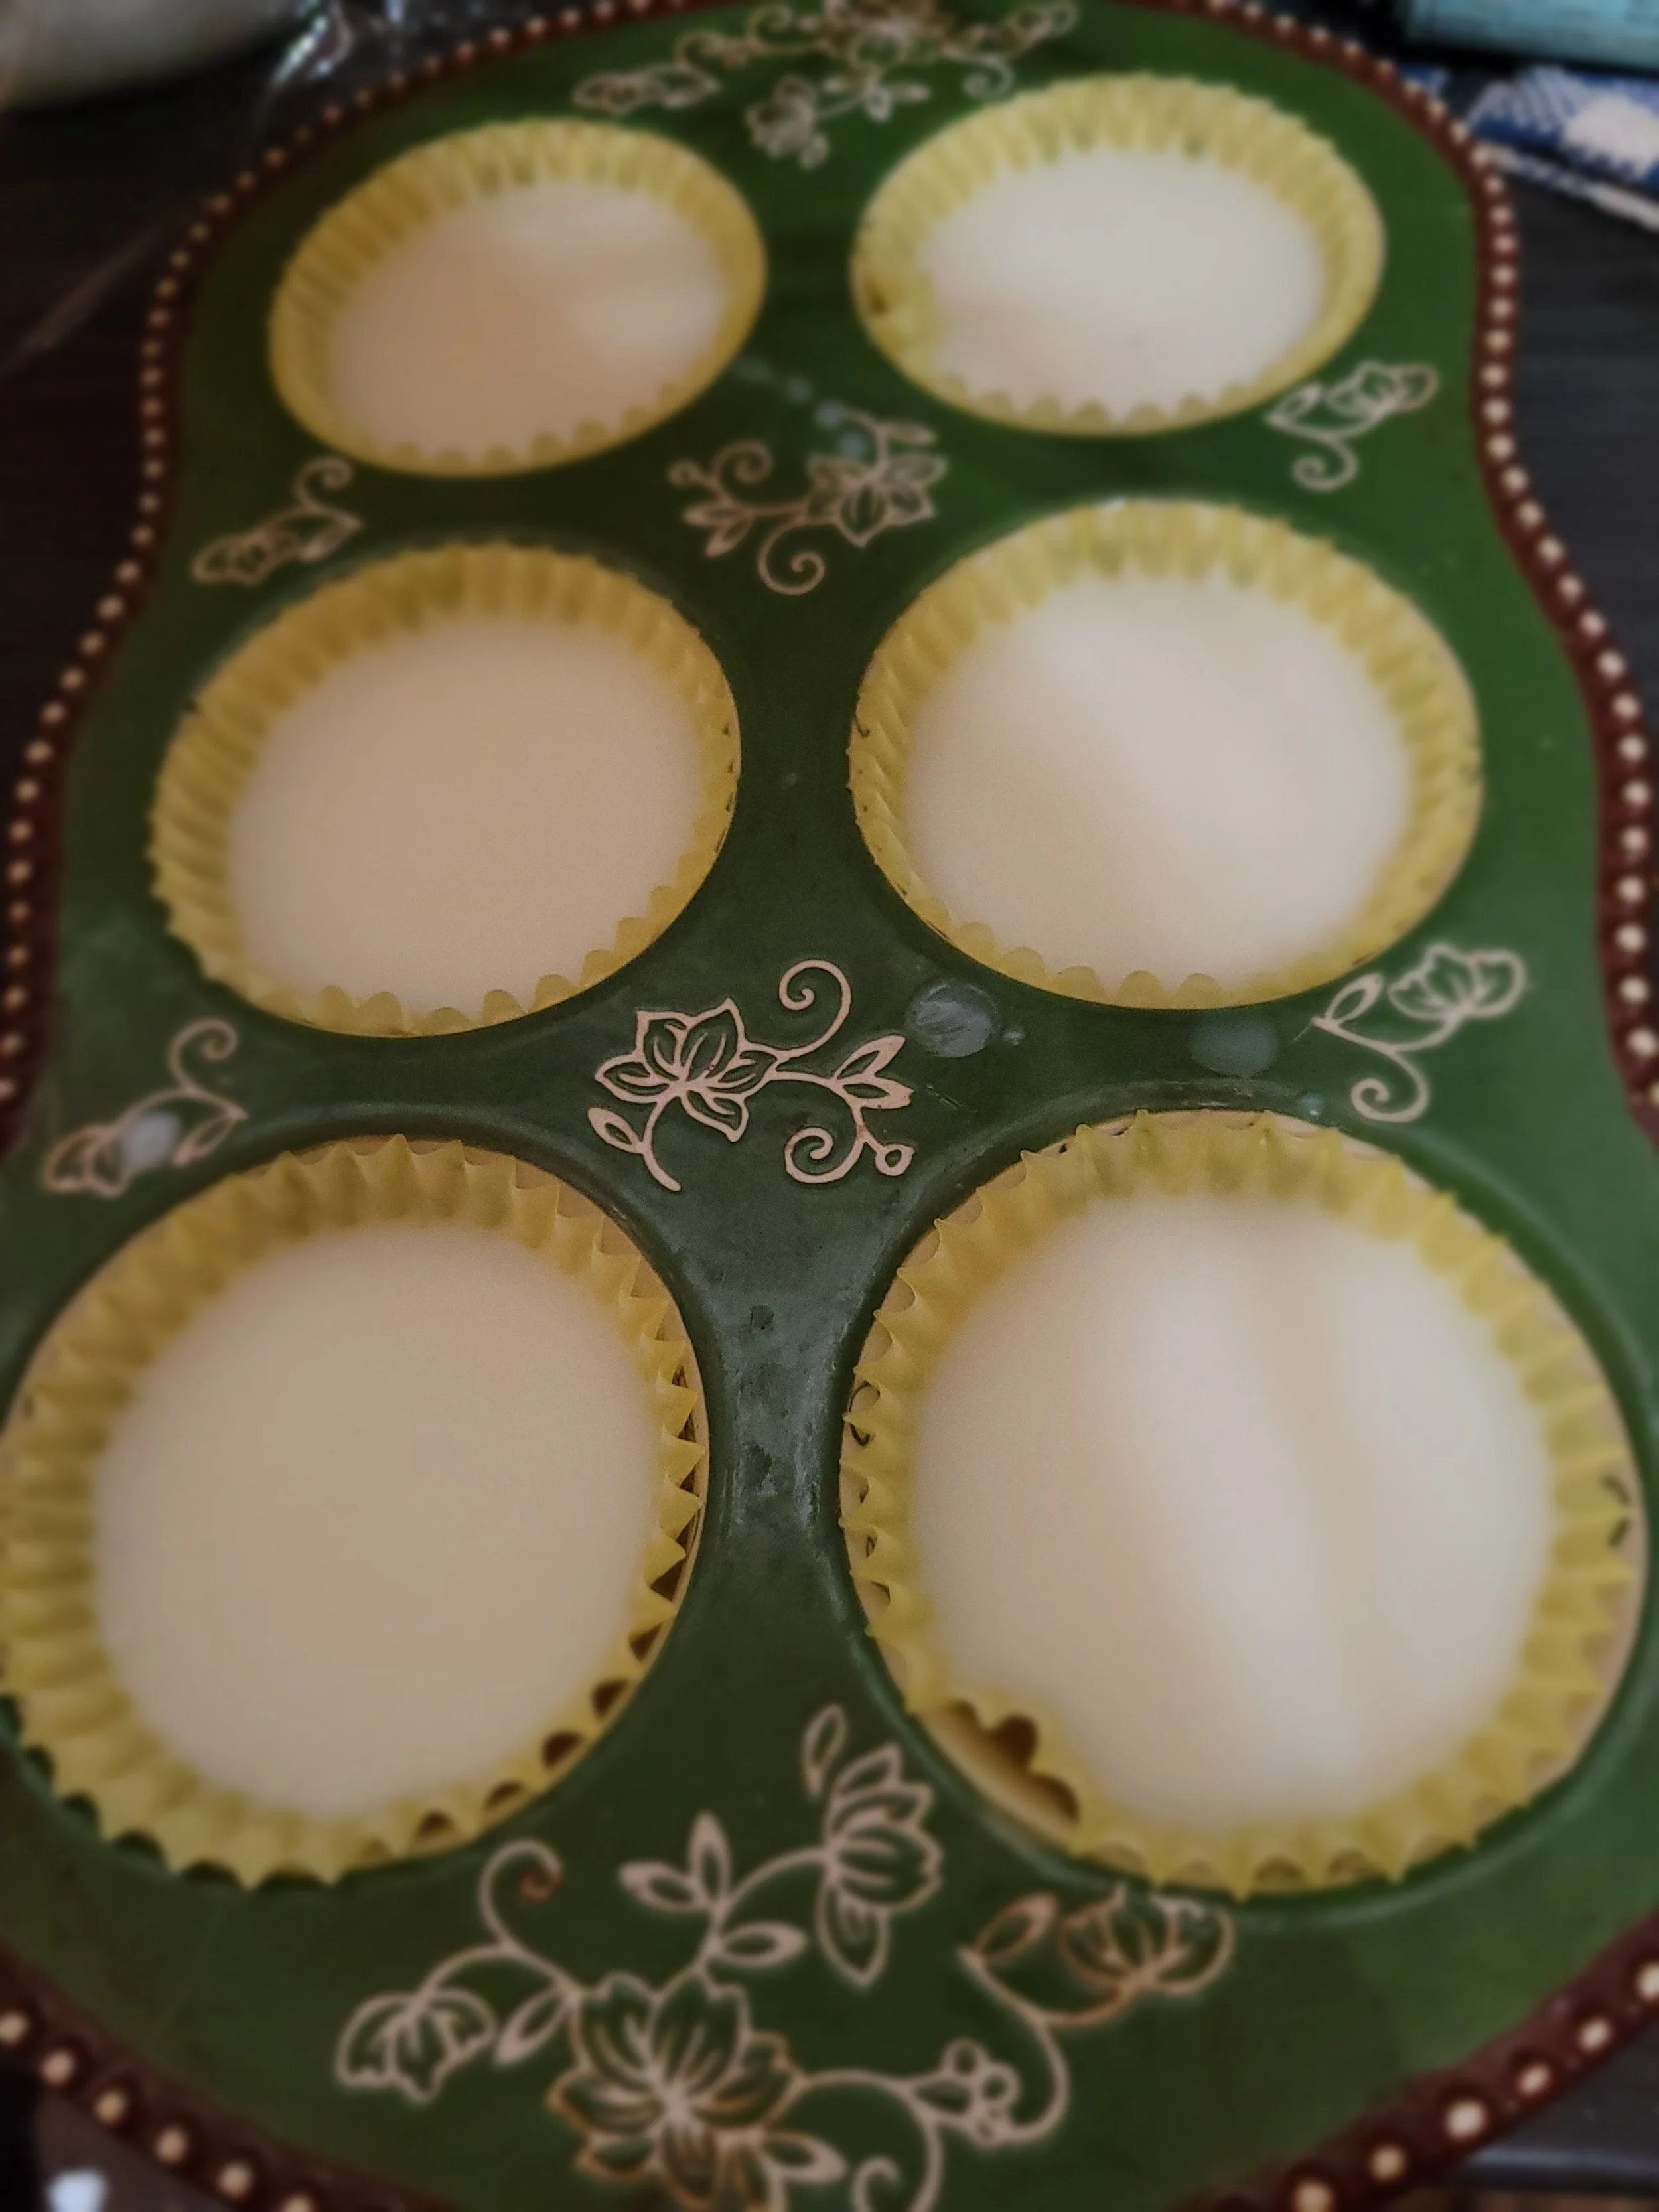
Use muffin cases to store lard.

When I discovered I could render lard in the instant pot I felt like a cavewoman that just discovered fire!

It is perfect in summer when you only want to do small batches and not heat up the house.

To make rendering quicker use ground pork fat but you can also just chop up pork fat.

I sometimes use my food processor to chop the fat which is easier if it is still slightly frozen.

INSTANT POT

  • Put ground fat into Instant Pot - don’t go above the max fill line.

  • Add 1/4 cup cold water

  • Press Pressure Cook (High) for 1 hour

  • Allow to cool with natural pressure release

  • Strain into containers (See tips about straining)

Tip - lard rendered in the instant pot may have some water which will settle as a gel under the cold rendered lard - I always strain mine into pans lined with parchment or cling film.

When its set turn it over and scrape off the gel, then store the lard as normal.

SLOW COOKER

  • Place the fat in a slow cooker and set it to LOW.

  • It will take several hours.  The cracklings will soon sink down and then rise up again.  

  • When they rise again the lard is done.

  • Strain into containers (See tips about straining)


    STOVETOP

  • Place fat in a heavy pot (cast-iron Dutch ovens are perfect because they distribute heat evenly), and set it to “2”.  

  • Once it begins melting set it to “1”.  

  • As the fat melts Strain into containers (See notes about straining)

OVEN


  • Set oven to 200 degrees F

  • Place it in a Dutch oven or roasting tray don't put a lid on you need the moisture to evaporate.

  • Strain into containers (See tips about straining)


If you over-cook it the lard will begin to brown and you’ll end up with lard that has a stronger porky flavour.  It’s still completely usable for things like frying and sauteing, it’s just not ideal for making sweet pastries and pie crusts.

In its liquid state, the colour of the lard will be like lemonade.  Once it cools and hardens it will become pure, delicious, white goodness.


Tips for Straining

Strain it through a fine mesh sieve to remove the cracklings.  Then strain it again through 3 layers of cheesecloth to remove the remaining small bits and sediment.

  • It’s critical that you remove any bits of fat and gristle along with any tiny bits of sediment, otherwise, your lard will get mouldy.

  • Pure fat doesn’t grow mould, it goes rancid.  So if there’s mould on it it’s because it wasn’t rendered long enough to remove all the water and/or it wasn’t strained properly.  So be sure to properly strain it.

  • Let it sit undisturbed at room temperature until it has cooled down and is firm (it firms up pretty quickly).   


Tips for storage

  • Jars

  • Bread pans - I line with plastic wrap - then I have brick-shaped lard

  • OR for pre-measured portions and easy clean up  - Measure how much a muffin tin holds, line with muffin casings and pour lard in. This is my personal favourite - Then I freeze the lard and take out as I need it.


What to do with the bits left behind - crispy cracklings!  Transfer them to a frying pan and fry until they’re puffy and crispy.  Add your favourite seasoning. Then if you don’t eat them straight out of the pan you can add to salads as a crispy topping!

Clean up Tips

Yes making lard can get a bit messy - If you have cast iron pans you need to season then put your lard covered utensils and sieve in the pans to catch all the lard drips.

You can also use parchment paper to lay your utensils on - then you sue this lard loaded paper to grease bread or cake tins, or to season cast iron.


Happy Rendering!


If you found this content useful and would like to buy me a coffee that would be greatly appreciated!


If you love bacon find out how to cook the perfect rasher.

Who doesn't love bacon? It's everywhere these days, ice cream, coffee, cupcakes, vodka, chocolate covered, chewing gum, bacon-scented candles, lip balm, soap & even deodorant. 

In its original pure form, the smell is irresistibly intoxicating and the taste hits every taste bud. 

Sunday in our house is when we have a fry up because its the law! Lol ok, not the law but it's tradition. Its good for the soul!

Usually its just bacon, sausage , eggs (fried in bacon fat of course!) but special occasions (usually means a hangover cure) call for a Full English or Full Monty (I’m not sure if this is just what we call it - when I worked in a canteen someone always asked for a Full Monty) bacon, sausage, eggs, black pudding, baked beans, tomatoes, mushrooms and bread! (Sometimes we fry the bread in bacon fat too!)

The morning after the night before 

A full English breakfast is the best cure

Bacon, eggs and sausage fried

will stop you feeling like you died!

We like British style bacon but there are so many types of bacon and cures. Ayrshire, Wiltshire, British bacon, Canadian bacon, Berkshire bacon, we get asked for it all. There are so many types of bacon and different names I think you could write a book, I’ve cut it down to the most common questions we get asked.

Ayrshire and Wiltshire are a type of cure named after the areas in the UK where they were originally made. Berkshire bacon is simply bacon made from the Berkshire breed of pig with any chosen cure. (This is what all our bacon is made from but we call it by the cut of pork used. At the moment we wet cure it without the bones and skin)

Cures 


Dry Cure - Pork is covered with a salt-based mixture

Wet Cure -  Pork is immersed in a liquid brine. 

Ayrshire bacon is produced from premium grade pigs and unlike some other kinds of bacon, the skin and bones are removed before curing. It's the only distinctive bacon cure in Scotland. The curing method, which begins with immersing the pork in brine, producing rich and flavoursome bacon that fries perfectly with no milky or watery residue. Once cured it is rolled and is quite distinctive with the fattier streaky rolled around the leaner back bacon. 

Wiltshire Cure is traditionally wet cured with the skin on and bone-in. It has a slightly salty flavour and a distinctively meaty texture. Dating back to the 1840’s and developed by the Harris family in Wiltshire, the country’s most prominent bacon producing county. In an age without electric refrigeration, the family would pack the roof with ice to keep the meat fresher for longer.

Nowadays the process still involves bone-in and rind-on pork being immersed into a special brine for up to two days but the cold storage is rather more high tech! In accordance with the traditional Wiltshire method the bacon is given a fortnight to mature, and time – after salt – is the most important ingredient.

Different Bacon Cuts/names

A Rasher is what we Brits call a slice of bacon.

Canadian Bacon/Back bacon - Smoked or un-smoked bacon cut from the boneless pork loin, this is called ‘Canadian bacon’ in the United States when cut into a thick medallion shape.

Side bacon - Pork belly, generally wet cured and smoked.

Streaky bacon - Pork Belly/side bacon

Peameal bacon - is back bacon, brined and coated in fine cornmeal (historically, it was rolled in a meal made from ground dried peas).

Middle bacon - The loin and belly as one piece cured and sliced - can also be smoked

Our own British Style Berkshire Back Bacon - wet cured bacon (not smoked) made from the eye of the loin and a small piece of the belly, a much loved and missed bacon rasher for us Brits.

6 bacon bits of trivia

  1. Bacon dates back to 1500BC - The Chinese were the first to cook salted pork bellies more than 3000 years ago. This makes bacon one of the world’s oldest processed meats.

  2. The word bacon comes from the Germanic root “-bak,” and refers to the back of the pig that supplied the meat. Bakko became the French bacco, which the English then adopted around the 12th century, naming the dish bacoun. Back then, the term referred to any pork product, but by the 14th century bacoun referred specifically to the cured meat.

  3. Bring home the bacon – there are a couple of possible origins to this saying. One goes back almost a thousand years to the Essex village of Dunmow where, it is said, in AD 1111 a noblewoman offered a prize of a side of bacon, to any man from anywhere in England who could honestly say that he had had complete marital harmony for the preceding year and a day. In over 500 years there were only 8 winners! (what a surprise lol) An alternative explanation comes from the ancient sport of catching a greased pig at country fairs. The winner kept the pig and ‘brought home the bacon’

  4. To save one’s bacon again a couple of possible explanations - In the early 17th century, “bacon” was thieves’ slang for “escape” so it indicates that a situation has been rescued. Alternatively, it may mean the sides of home-killed bacon that every peasant family would have hanging up in the house. This would have been valuable property and if you or somebody else “saved your bacon” from fire or theft you would have had a narrow escape.

  5. The first bacon factory opened in 1770 -  a businessman named John Harris opened the first bacon processing plant in the county of Wiltshire, where he developed a special brine for finishing the meat - The "Wiltshire Cure".

  6. It was used to make explosives during World War II - households were encouraged to donate their leftover bacon grease to the war effort. Rendered fats created glycerin, which in turn created bombs, gunpowder, and other munitions.

 
Tips for Cooking the perfect rasher.

(of course I am going to say start with Berkshire Bacon!)

STOVETOP

  1. Bring bacon to room temp for 15 to 20 mins.

  2. Put in a cold frying pan - (don’t overlap the rashers)

  3. Cook over medium heat for about 10 mins - turning as necessary

MICROWAVE

  1. Line a microwave safe plate with paper towel

  2. Lay bacon on top - don’t overlap the rashers

  3. Cook on high for about 5 mins

OVEN METHOD

  1. Line a backing sheet with parchment paper and lay bacon on top. I use a pan with ridges in it so it saves the need for parchment.

  2. Put in a cold oven then set oven to 400 degrees F.

  3. Bake for about 30 mins until done to your liking.

  4. Drain on paper towel.

Try this easy recipe to put a little gourmet spin on your bacon. You could also use maple syrup instead of honey and likely any spirit of your choice - let me know what your favourite is!

Honey whisky bacon

  • ¼ teaspoon pepper

  • 12 slices Cobblestone Farm Berkshire side bacon

  • ¼ cup honey

  • 2 tablespoons whisky

  1. Preheat oven to 350 F - yes you can use the cold oven method if you like.

  2. Combine honey and whisky in a small pan. Bring to boil. Remove from heat and let cool slightly

  3. Lay bacon on a baking sheet and put in oven for 10 mins

  4. Brush with honey whisky mix

  5. Put back in oven for 10 -15 mins

  6. Sprinkle with pepper and serve

Bacon & Jalapeno Canneloni

  • 10 rashers Cobblestone Farm Berkshire side bacon

  • 8 oz cream cheese

  • 1/2 cup pickled jalapenos chopped

  • 1/2 cup strong cheddar

  1. Preheat oven to 350 degree F

  2. Wrap 10 pieces of cannelloni in foil, tucking in edges. Wrap 1 slice of Berkshire bacon around each tube, and place on baking sheet.

  3. Bake until very crispy, about 30-40 minutes. Set aside and allow to cool completely before filling.

  4. While bacon cools, make the filling:

  5. In a medium bowl, mix together the cream cheese, jalapeños, and cheddar cheese with an electric mixer until combined. Place mixture in a piping bag and fill each bacon shell.

  6. Enjoy!

Bacon Infused Vodka (Makes a mean Bloody Mary)

  • 1/2lb Cobblestone Farm Berkshire side bacon (or bacon ends)

  • 750ml vodka

  • Screw top jars.

    1. Cook the bacon.

    2. Let cool.

    3. Put cooled bacon and all the fat too - you throw it away later - in a jar and cover with vodka.

    4. Close lid and leave it for 2 weeks.

    5. Strain into a clean jar. Throw bacon and fat away.

    6. Store in fridge until ready to use.

If you want to share your favourite bacon recipe add it in the comments below!

It never rains then it pours - easy rainy day recipes.

Yes! Thankfully we finally got rain!! Apparently, this has been the driest spring on record and I have almost driven myself nuts checking the weather app for incoming rain.  It's an old joke that the weatherman gets paid to do a job where he can be wrong 90% of the time, the weather app gets it wrong too!

The little blue dot that is our house has the rain clouds overhead and ITS NOT RAINING! Rain is always forecast for next week and then they take it away again, same in winter when it’s minus 30, they forecast minus 10 next week - always next week - I think its just to keep our spirits up in extreme weather conditions. I discovered how to make it rain - I put Carls boots outside lol!

Of course all the pigs decide to have their babies on the coldest or wettest days and we still have all the chores to do - it’s so much more fun in the mud! When we first moved here we had no idea what the weather was like so we were mending a fence in the pouring rain which caused raised eyebrows amongst our neighbours.  Why are you working outside in the rain? Why don’t you wait for a nice day we have lot of those? A Rain day in Saskatchewan is a day off but where we are from back in the UK nothing would get done if you didn’t work in the rain.

So its pouring down with over an 1.5” rain so far and a full day of rain ahead and I thought I better spend the day in the house and catch up on getting some meals in the freezer ready for the rest of summer. Anyway that plan went right out of the window when I had to use all my pans to catch the rain coming through the leaky roof!! I better order more pans! No not really - I did order some tin for the roof though - installing that will be a fun husband and wife job to look forward to!

So roof is ordered and it's down to some recipe researching and maybe a bit of experimenting with my 2 remaining pans and anything I can find in the cupboard.

I always have raw honey in the house - I use it every day in my spiced tea (recipe below). I don’t know if its my age or because I broke my hips (horse riding accident and another story) anyway I used to have to roll out of bed my joints were so seized and painful - I drink this spice tea everyday now and I can jump out of bed.

So I found a couple of recipes to try and share - I like the bbq sauce recipe as it needs no cooking and the jalapeno honey steaks are easy to make plus they have a bit of a kick - I was surprised at how Carl tucked into those - they didn’t even make it to the plate he ate them right out of the pan.- less washing up! Bonus!

Spiced Tea

  • ½ teaspoon turmeric,

  • ½ teaspoon cinnamon

  • raw honey to taste,

  • hot water

    Put spices and honey in a large mug, fill with hot water and sip - I don’t drink the gloopy stuff at the bottom lol its not nice.

    Quick Glazed Pork Tenderloin

  • 1 Cobblestone Farm Berkshire pork tenderloin

  • 1 tsp ground allspice

  • olive oil or pastured pork lard

    BBQ SAUCE

  • 2 cloves garlic grated

  • 2 tablespoons Worcestershire sauce

  • ⅓ cup tomato ketchup

  • 2 tbsp hp sauce

  • 1 tablespoon raw honey

  • 1 tbsp soy sauce

  • 1 tsp tabasco or hot sauce

  • 3 tbsp apple or orange juice


    Score tenderloin lengthways and open it like a book then flatten it with your fist or a rolling pin.

    Rub with salt, pepper and allspice

    Put in frying pan with 1 tbsp of oil or pastured pork lard.

    After about 4 mins turn it over.

    Mix together all bbq sauce ingredients.

    When the tenderloin has a good crust on both sides transfer to a baking dish and cover with half the sauce.

    Put under broiler/grill until pork is cooked through (165 degrees internal temp)

    Serve with rice

Honey, Jalapeno Pork Steaks

  • 2 Cobblestone Farm Berkshire pork steaks or chops

  • Himalayan salt

  • 4 jalapenos chopped and seeded (If you want extra kick leave some seeds in)

  • ½ cup vodka

  • 1 orange rind and juice

  • 1 cinnamon stick

  • 3 sprigs thyme

  • ½ onion chopped

  • 1/2 cup water or broth

  • 2 garlic cloves grated

  • ½ cup raw honey

  • ⅓ cup white vinegar

Put oven on 350 degrees F

Put vodka and jalapenos in a bowl for 30 mins.

Season pork steaks with salt.

Mix honey, vinegar, garlic and orange rind and juice in a bowl.

Heat large pan on high - these steaks are large so you may need a roasting pan.

Add Pork, cinnamon stick, 1 sprig thyme  and fry 5 mins each side on med high heat

Add onion and fry till translucent

After jalapenos have been in vodka for 30 mins drain -(keep vodka for a spicy Caesar cocktail)

Add honey mixture, jalapenos and water or broth to pan and bring to boil.

Cover and place in oven for about an hour (until tender) - I cooked mine for 40 mins then reheated them for 30 mins before serving.

Serve with rice

I hope you enjoy trying these recipes and just for fun - Ketchup or HP? Which is your favourite on a breakfast sandwich - Carl is a HP and sausage butty guy.